FAQ
This section contains answers to frequently asked questions about Yandex Map Editor.
If you didn't find the answer to your question, you can ask our customer support staff.
1. Drawing roads
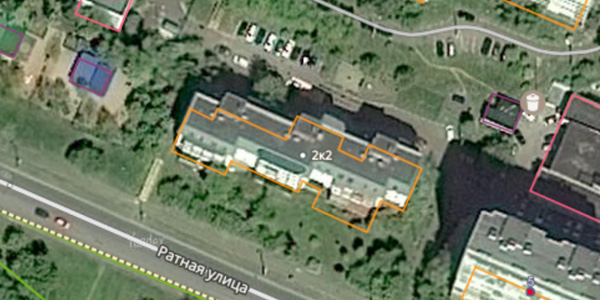
1.1. How do I draw a road?
-
Find a place on the map where a road should be:
-
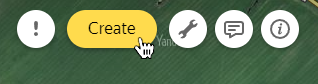
Click Create:
-
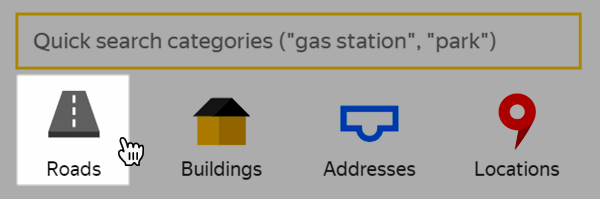
Choose Roads:
-
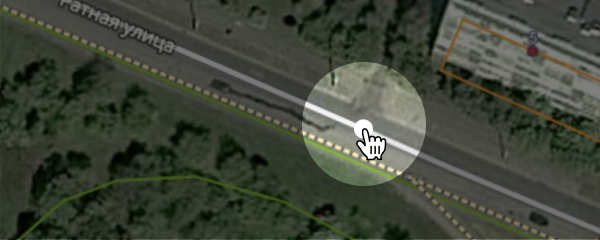
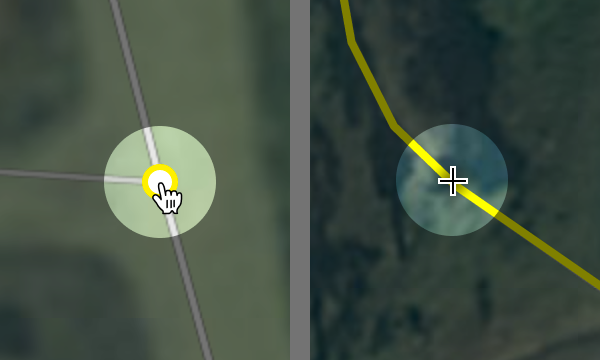
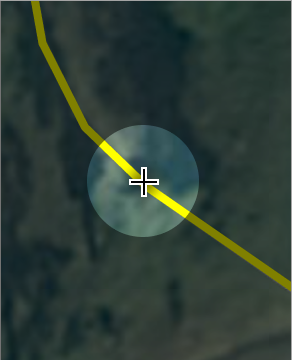
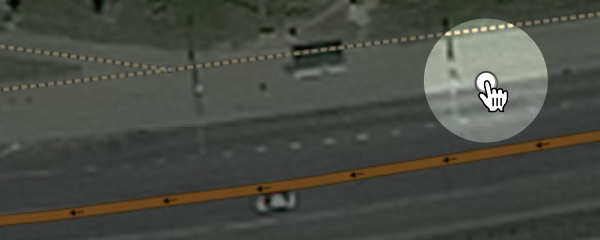
Start drawing on a road that's already there if possible:
-
Place the first point and let go of the mouse button:
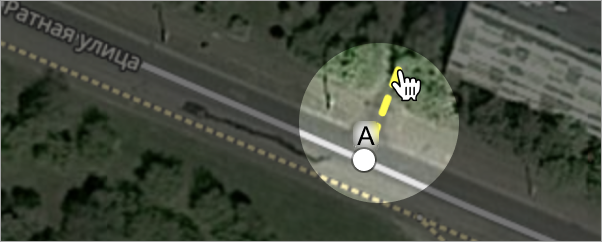
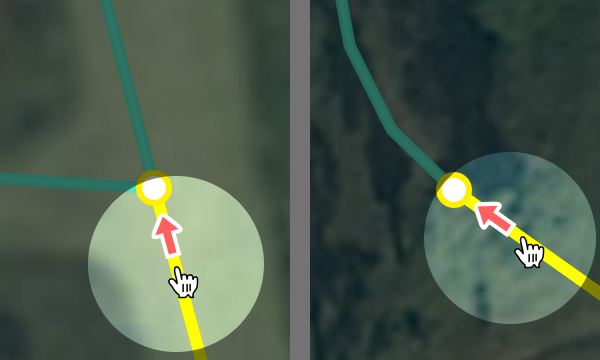
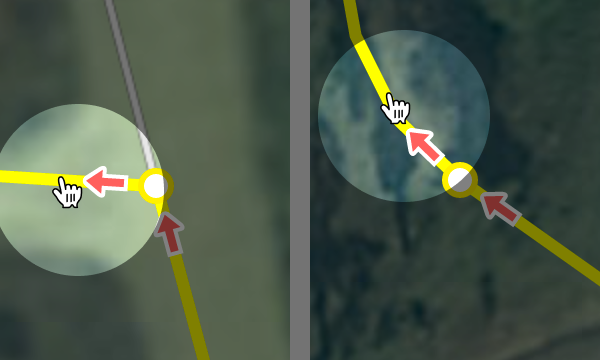
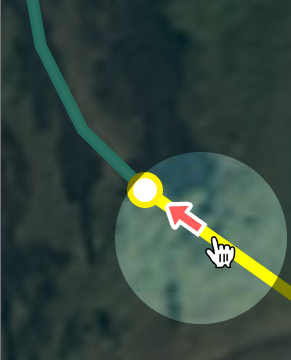
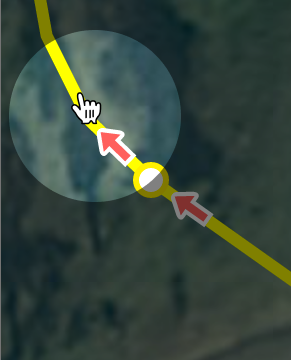
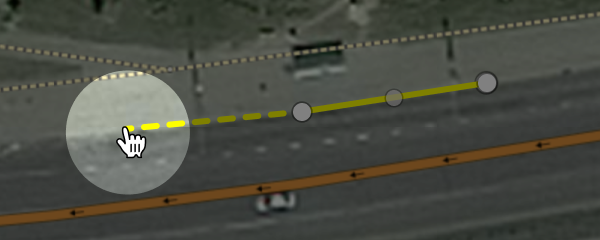
Place points on turns. The line must follow along the road's center on satellite images:
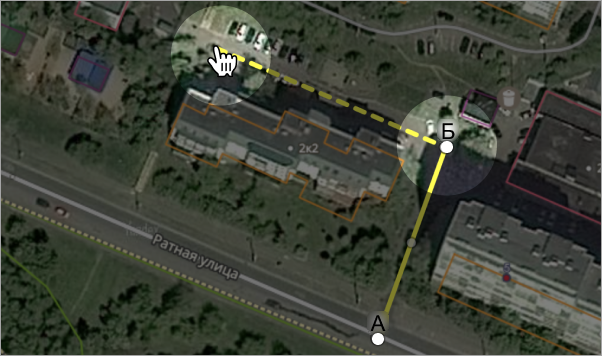
-
Click Round all corners after you finish drawing:
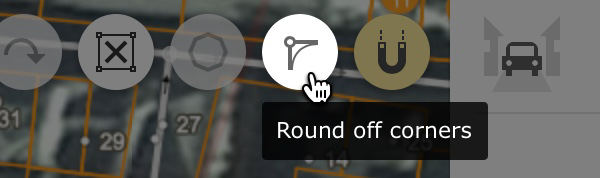
-
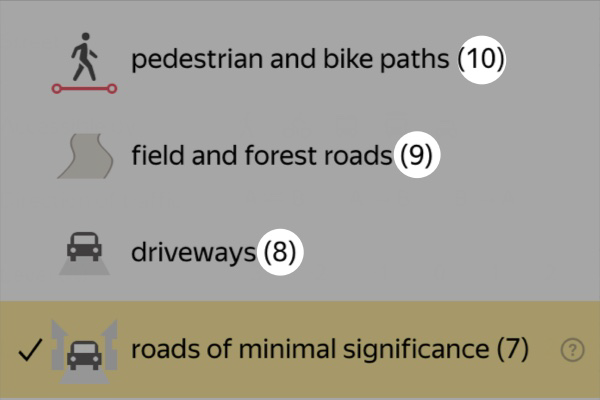
You can change the road type if necessary:
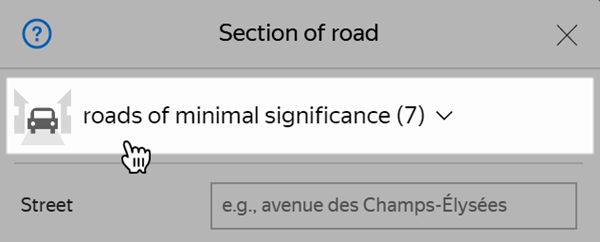
For example:
-
10 — pedestrian paths
-
9 — unpaved roads (in forests of fields)
-
8 — roads within a block (leading to house entrances):
-
-
Save the road you've drawn:

For more information, see Section 3.3.1. Rules for drawing roads and road sections.
1.2. How do I add a No Turn or No Entry sign?
Keep road signs and physical barriers in mind to avoid mistakes when building a route. Use the Road sign
attribute when dealing with barriers and signs that block traffic. You can correct the route by adding it to the right location.
-
Click Create:
-
Choose Road infrastructure:

-
Choose Restricted maneuver:

-
Click the location point you want to restrict access to. This can be an intersection or a point on a road:
-
Click the road section that should still be accessible to transport:
-
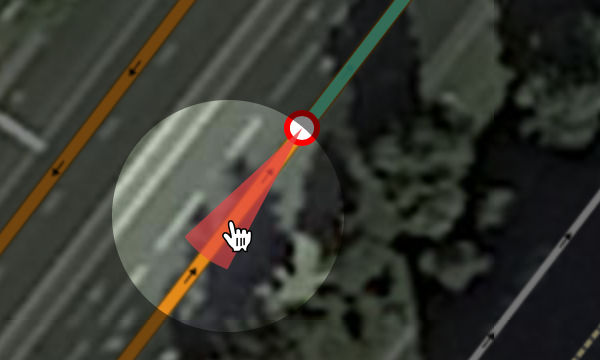
Click the road section where the restricted area starts. You don't have to choose any other sections:
-
Click Save:
For more information, see Section 3.3.4. Road signs
1.3. Adding a boom gate or checkpoint
Keep road signs and physical barriers in mind to avoid mistakes when building a route. Use the Road sign attribute when dealing with physical barriers and signs that block traffic. You can correct the route by adding it to the right location.
-
Click
Create
: -
Choose
Road infrastructure
. -
Choose
Restricted entry
:
-
Click the location of a barrier:
-
Click the road section that should be accessible to transport:
-
Click the road section you need a permit to access. You don't have to choose any other sections:
-
Click
Save
:
For more information, see Section 3.3.4. Road signs
1.4. Adding a traffic light
Add a traffic light if you know a location that lacks one.
-
Click
Create
: -
Choose
Road infrastructure
. -
Choose
Traffic light
:
-
Click the intersection if it's regulated by the traffic light. For other cases, click the relevant point on the road (e.g. near a pedestrian crossing):
-
Click the road sections with traffic regulated by a traffic light. Only choose a road section if you're sure it needs a traffic light:

-
Click
Save
:
For more information, see Section 3.8.4. Traffic lights.
1.5. Adding a speed camera
Cameras that monitor traffic violations can also be added to the map. Yandex.Navigator will then warn you and other drivers as they approach one.
-
Click Create:
-
Choose
Road infrastructure
: -
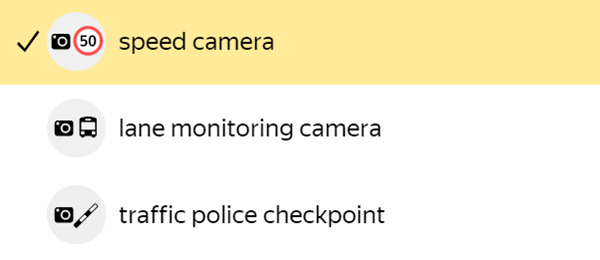
Choose
Camera
:
-
You can change the camera type if necessary:
-
Click an intersection or other area the camera is located in:
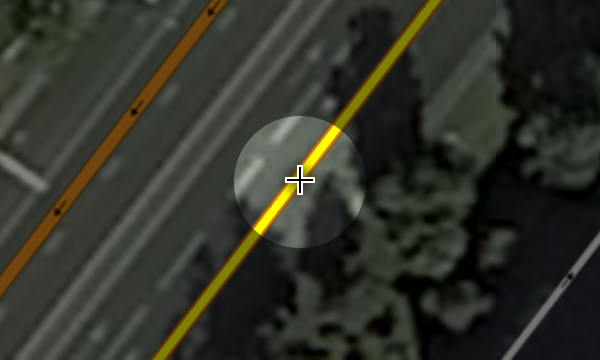
-
Click the area monitored by the camera:
-
Specify the camera's operational schedule if necessary:

-
Click Save:
For more information, see Section 3.8.3. Speed cameras.
1.6. Changing the speed limit
Did your route get a new road sign or an updated speed limit? You can edit speed limit information, so that Yandex.Navigator warns you and other drivers as you approach the area under that speed limit.
-
Enable road color-coding by speed limit. Click
Layers
: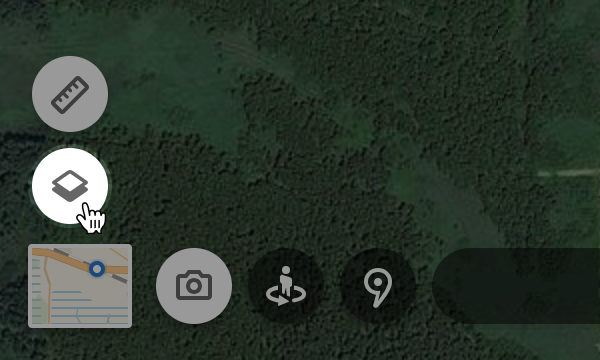
Select color coding from the drop-down list:
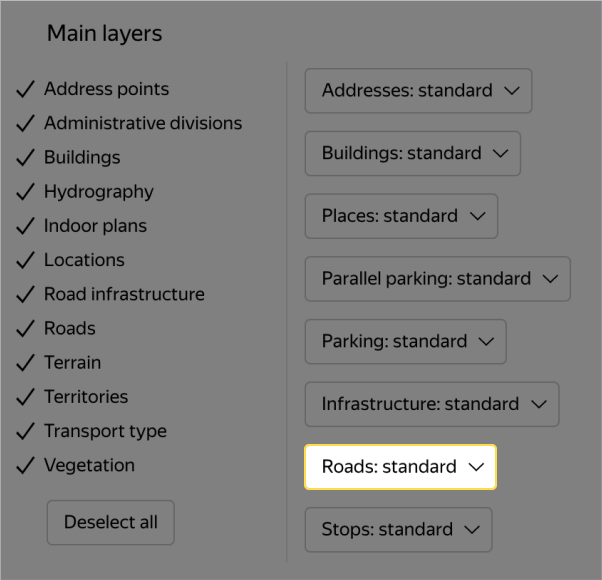
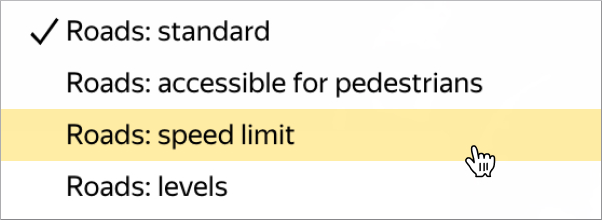
Now you will see speed limits displayed on the map:
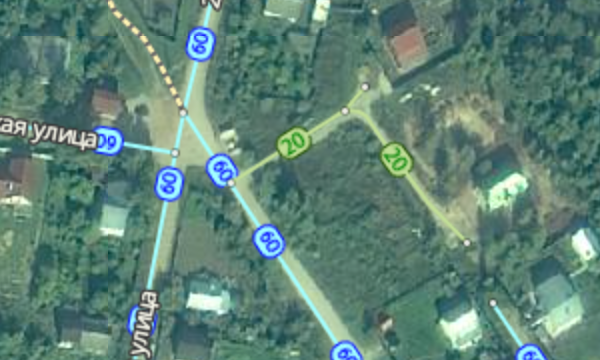
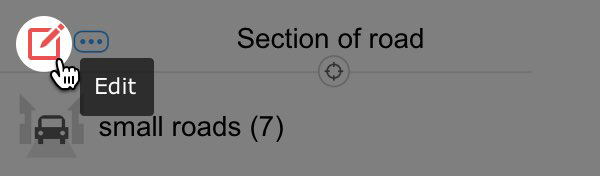
-
Click a road section with an incorrect speed limit. Click Edit in the panel that opens:
-
Enter the correct value into the
Speed limit
field: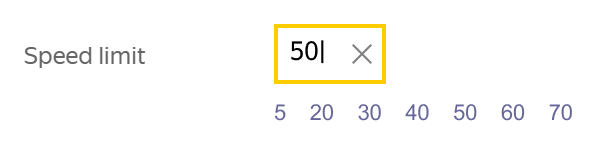
-
Click Save:
For more information, see Section 3.3.2.8. Speed limit.
2. Drawing addresses
2.1. Adding an address to the map
-
Click Create:
-
Choose Addresses:

-
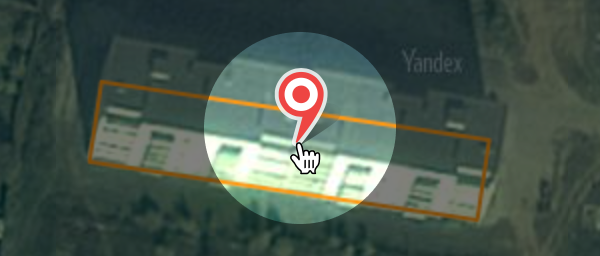
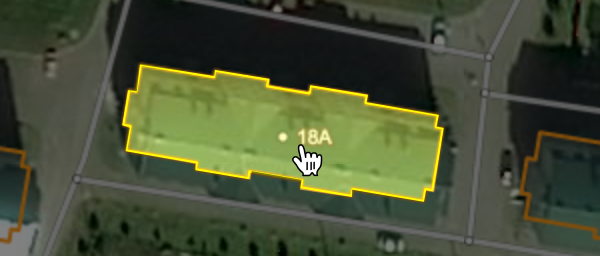
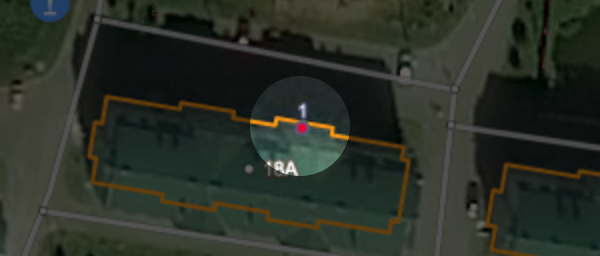
Place the address point in the building's center:
-
Choose the street name (you can specify the locality if it's the main part of the address instead):

Read below for instructions on what to do if there's no fitting address in the list.
-
Enter the building number:

-
Click Save:
If there is no corresponding street or locality in the list, then they don't yet exist in the Map Editor or an error occurred. You won't be able to save such an address.
Read more on how to draw streets and localities from scratch.
For more information, see Section 3.5.1. Rules for drawing addresses.
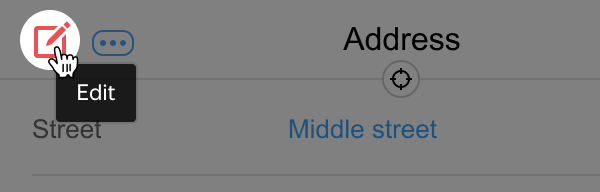
2.2. Editing a building number or a street name
-
Click the incorrect address:
-
Click Edit in the panel that opens:
-
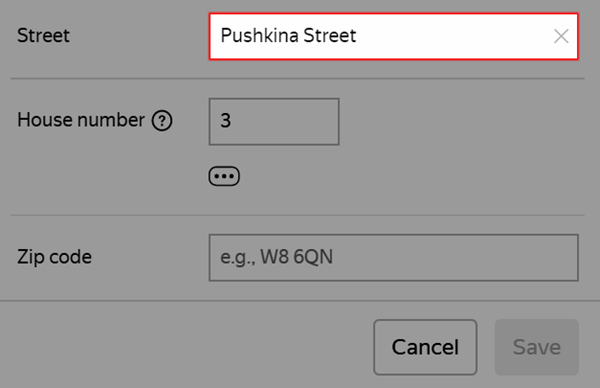
Choose the correct street (you can also specify a locality if it's the main part of the address instead):
Read below to learn what to do if there is no corresponding street or locality in the list.
-
Enter the correct number:
-
Click Save:
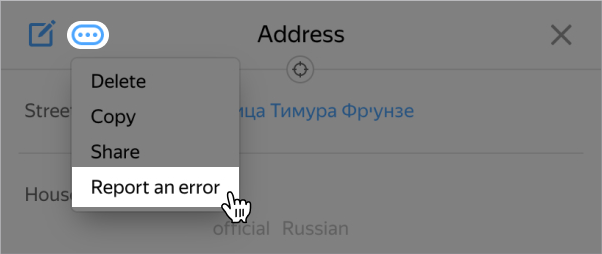
You won't be able to save your address if there is no corresponding street or locality in the list.
To fix the error, write an error report to the moderator. They will add the required street and specify the correct building number. Click Report an error
in the address card:
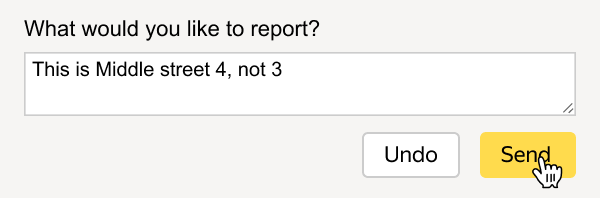
Enter the correct address and add any additional information that might help the moderator to fix the issue. Click Submit
:
For more information, see Section 3.5.1. Rules for drawing addresses.
2.3. Moving an address placemark
-
Click the address:
-
Click Edit in the panel that opens:
-
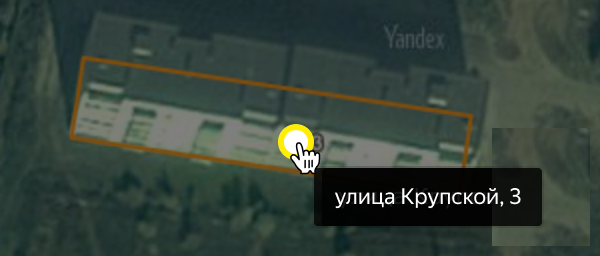
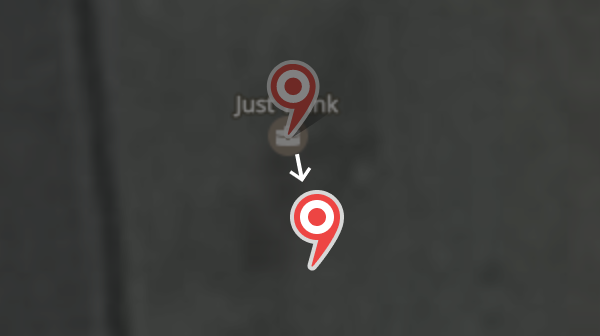
Move its placemark:
-
Click Save:
For more information, see Section 3.5.1. Rules for drawing addresses.
3. Drawing buildings
3.1. Adding a building
-
Click Create:
-
Choose Buildings:

-
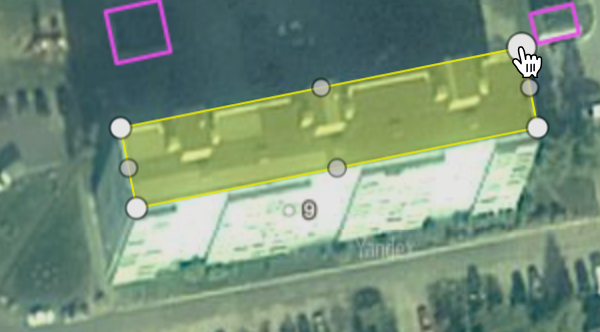
Click any point that's part of the building roof's shape and move the cursor by clicking the points placed on turns. An outline will be drawn as you move the cursor. Draw the roof of the building:
-
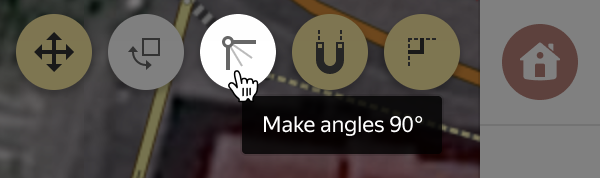
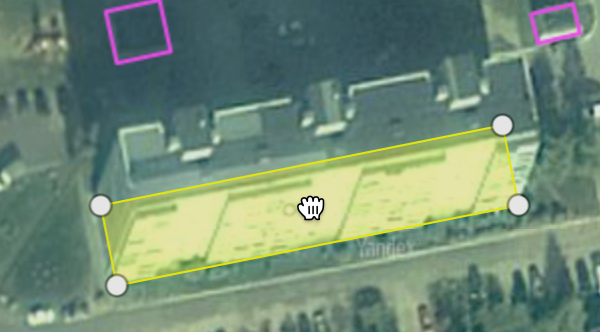
Click
Trim corners
:
-
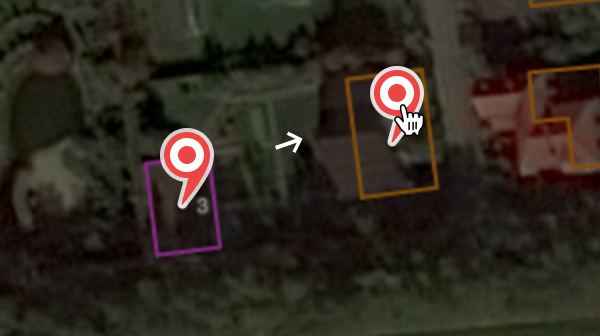
Drag your outline to the building's footprint (it's easier to draw a building's shape by following the roof, but you will still have to attach it to the footprint later):
-
Select another building type if this is not a residential building:

-
If the building is still under construction, choose the
under construction
status:
-
Usually the best way to calculate the
Height
attribute is to count the number of floors in the building and multiply it by 3:
-
Specify the building's
Main organization
(if there are any inside the building's polygon). If not, the area will be grayed out:
-
Click Save:
For more information, see Section 3.4.1. Rules for drawing buildings.
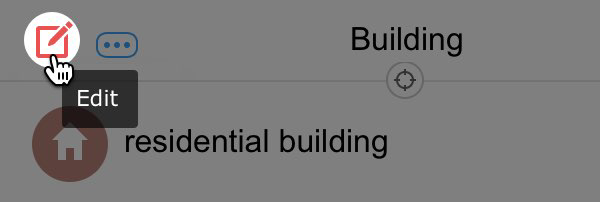
3.2. Showing that a building was demolished
-
Click a building and choose
Edit
:
-
Choose
Demolished
in theStatus
field. You don't need to set any other attributes: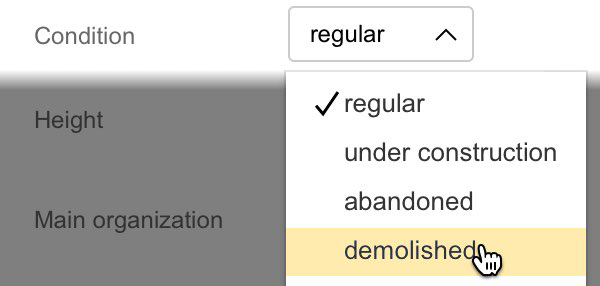
-
Click Save:
For more information, see Section 3.4.2. Rules for adding attributes to buildings.
3.3. Editing a building number or a street name
-
Click the incorrect address:
-
Click
Edit
: -
Specify the correct street name:
-
Enter the correct number:
-
Click Save:
You won't be able to save your address if there is no corresponding street or locality in the list.
To fix the error, write an error report to the moderator. They will add the required street and specify the correct building number. Click Report an error
in the address card:
Enter the correct address and add any additional information that might help the moderator to fix the issue. Click Submit
:
For more information, see Section 3.5.2. The rules of attribution of addresses.
4. Drawing organizations
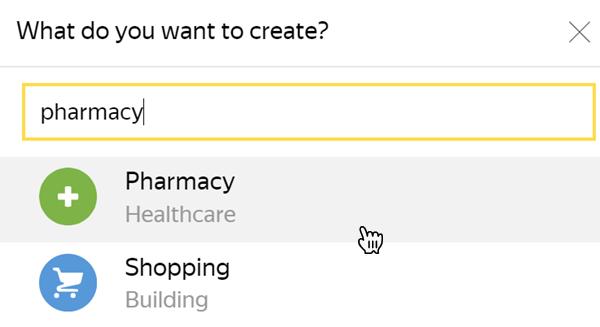
4.1. Adding an organization
-
Click Create:
-
Start typing the organization type in the quick search bar and choose one from the drop-down list that appears, like Pharmacy:
-
If you don't see the type you need, try finding it in the main menu:

-
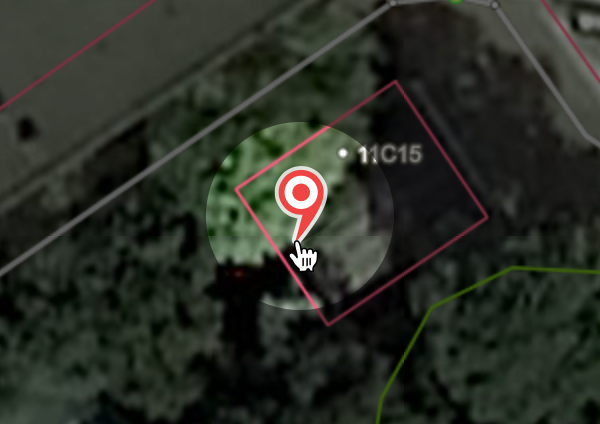
Click a placemark near the organization's entrance inside its building's polygon:
-
Click the
Yandex Business business
field. If the organization already has an entry in Yandex Business, it will show up in the list. Choose the corresponding line from the list to have the organization's information linked to the map: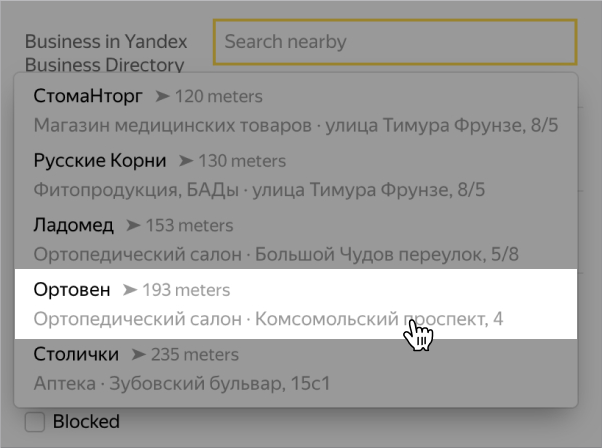
-
If the organization is not in the list, manually add its name and information:

-
Click Save:
For more information, see Section 3.6. Locations.
4.2. Indicating that an organization no longer exists or was closed
-
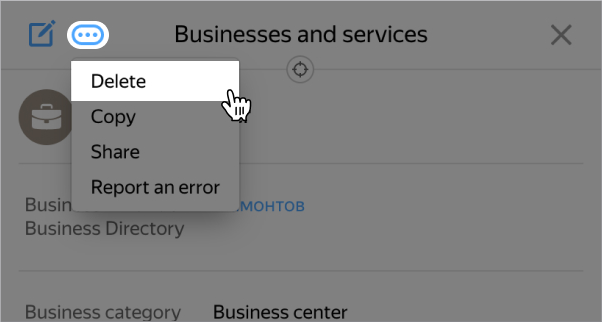
Click the organization icon on the map:

-
Open the menu and select
Delete
:
-
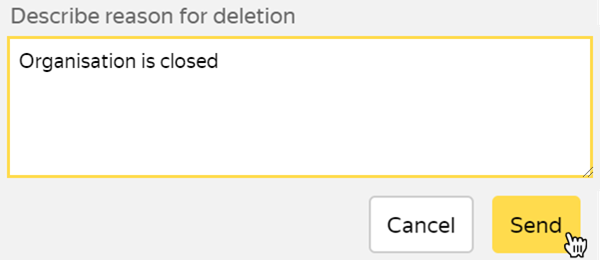
Describe the reason behind the removal and click
Send
:
For more information, see Section 3.6. Locations.
4.3. Adding or editing information about an organization
-
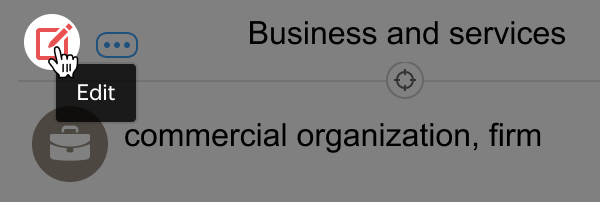
Click the organization icon on the map:
-
Click Edit:
-
Enter the updated information and click
Save
:
For more information, see Section 3.6. Locations.
4.4. Moving an organization's placemark
-
Click the organization icon on the map:
-
Click Edit:
-
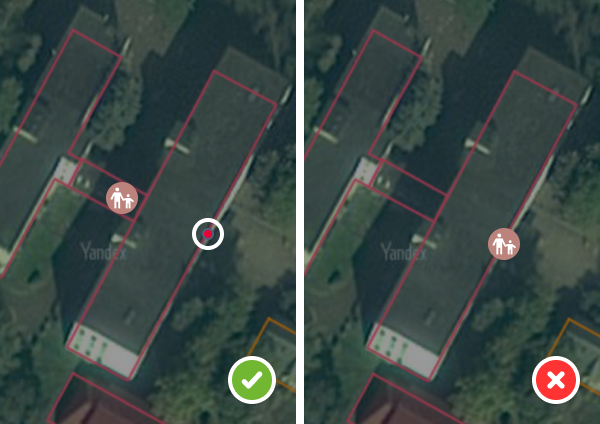
Move the placemark to the organization's entrance inside its building's polygon:
-
Click
Save
:
For more information, see Section 3.6. Locations.
5. Drawing building entrances
5.1. Adding an entrance to a residential building
-
Click the building you need to add an entrance to:
-
Click Add in the
Building entrance
field:
-
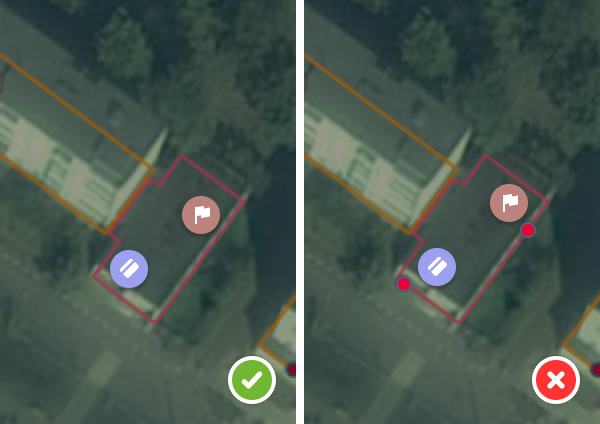
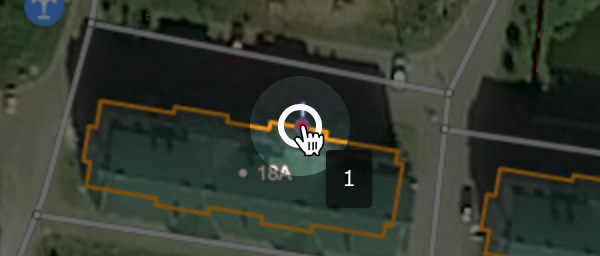
Position the entrance on the building's outline:
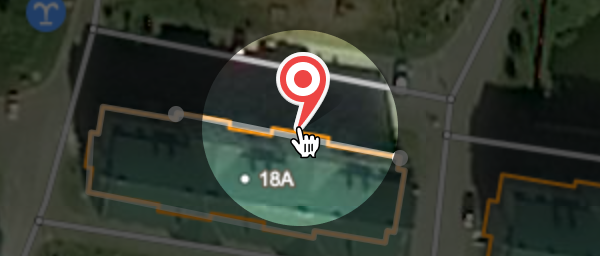
-
To add an entrance number, click Add name:

-
Enter the number of the entrance (do not include the word entrance or symbols such as #):
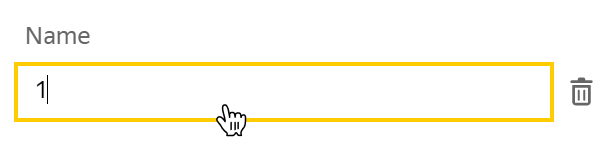
-
Click
Save
:
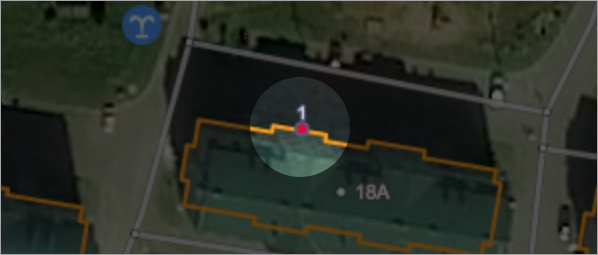
The entrance appears on the map as a red dot:
For more information, see Section 3.4.3. Building entrances: drawing and attribution rules.
5.2. Adding an entrance to an organization
Usually you only have to position an organization's placemark at the building entrance:
Follow the instructions: 4.4. How do I move an organization's placemark?
If an organization occupies the entire building, putting a placemark in the building's center may place it too far away from the entrance. For such cases, you can add an entrance to a building to make it easier to navigate:
Add your entrance the same way you do with residential buildings. For more information, see 5.1. How to add an entrance to a residential building.
For more information, see Section 3.4.3. Building entrances: drawing and attribution rules.
5.3. Adding a building entrance number
-
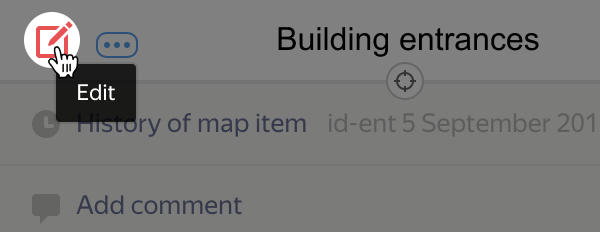
Click the placemark for an unnumbered entrance:
-
Click Edit:
-
Click Add name:
-
Enter the number of the entrance (do not include the word entrance or symbols such as #):
-
Click Save:
Now the entrance to the building has a number:
For more information, see Section 3.4.3. Building entrances: drawing and attribution rules.
5.4. Changing an entrance location
-
Click the placemark of the building entrance you want to move:
-
Click Edit:

-
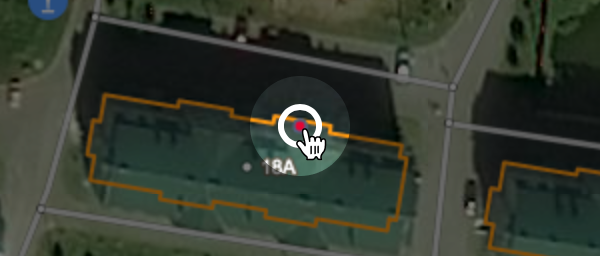
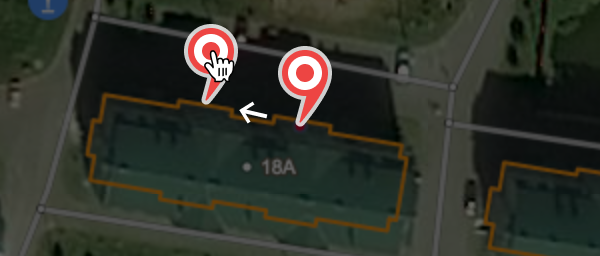
Move the placemark to another area inside the building's polygon:
-
Click
Save
:Now the entrance to the building is in a new location:
For more information, see Section 3.4.3. Building entrances: drawing and attribution rules.
6. Drawing parking lots
6.1. Adding a parallel parking area in a locality
-
Click
Create
: -
Choose Road infrastructure:
-
Choose Parallel parking area:

-
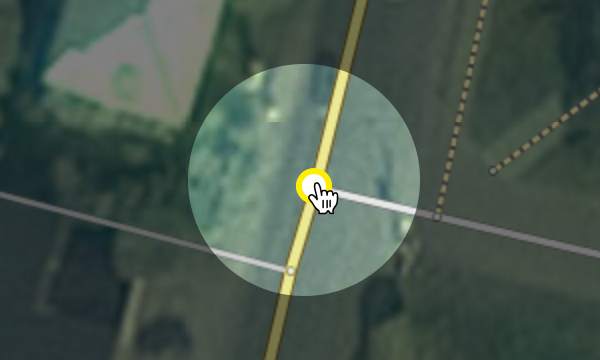
Put the first point where the road's edge is in the satellite image:
-
Put points on the road's bends:
-
Click the last point and choose
Finish
once your parking lot is ready: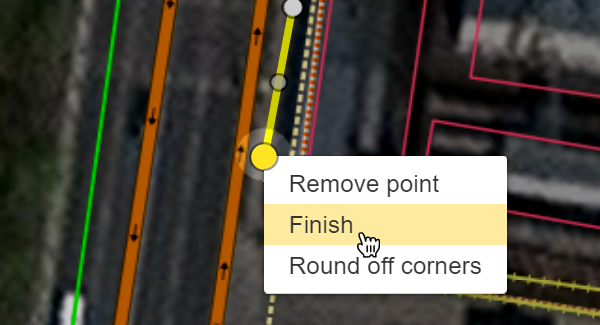
-
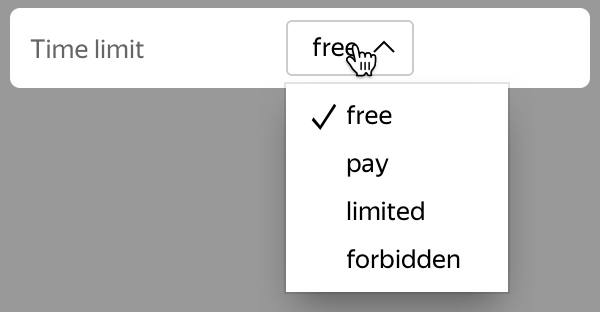
Specify the parking lot's type:
- Free — any driver can park for free
- Paid — any driver can park their car, but they have to pay first
- Restricted — a parking space for people with disabilities or staff
- Prohibited — traffic regulations and road signs prohibit any parking in the area:
-
Click Save:
For more information, see Section 3.8.2. Parking: rules for drawing and adding attributes.
6.2. Adding a parking area within a block or near a shopping center or an organization
-
Click
Create
: -
Choose Road infrastructure:
-
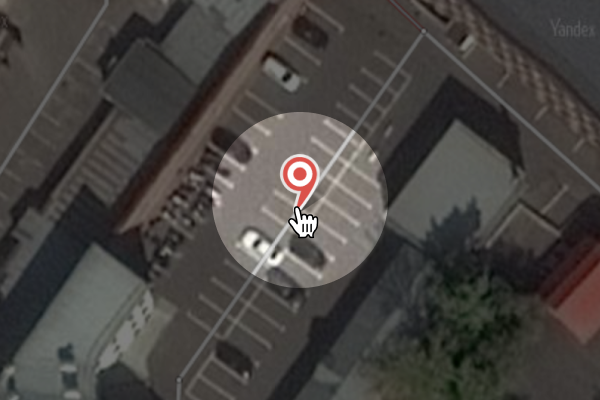
Choose Parking areа:

-
Put a placemark near the entrance. If there is more than one entrance, put the placemark in the center instead.
-
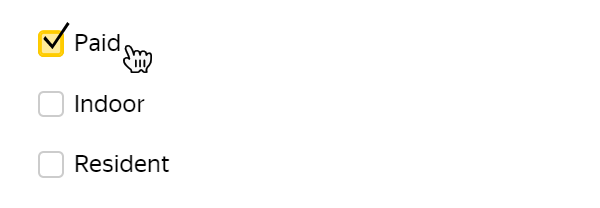
Specify the parking lot's type:
- Paid — any driver can park their car, but they have to pay first.
- Indoors — a parking lot is located underground or inside a building.
- Residential — entry restricted by a boom gate or only accessible to locals or staff
-
Click Save:
For more information, see Section 3.8.2. Parking: rules for drawing and adding attributes.
7. Handling inaccuracy reports
7.1. Handling inaccuracy reports
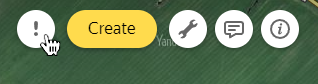
-
Enable inaccuracy reports layer:
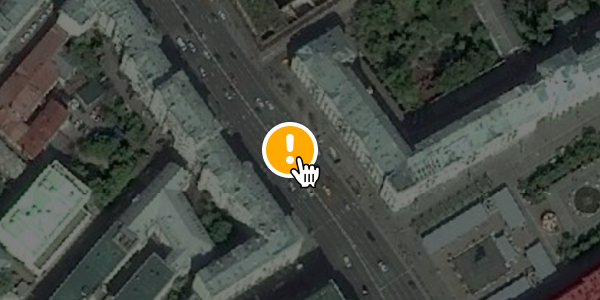
-
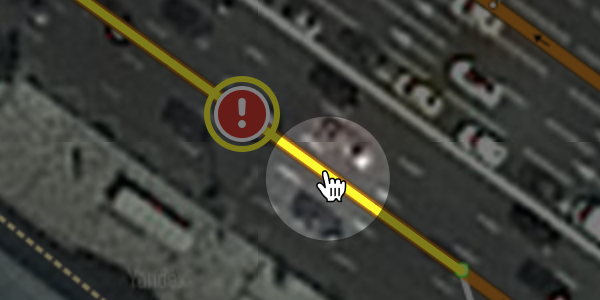
Choose a report on the map:
-
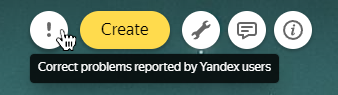
Click Accept in the report card to fix the inaccuracy

If you don't want to deal with an inaccuracy, click Don't accept
-
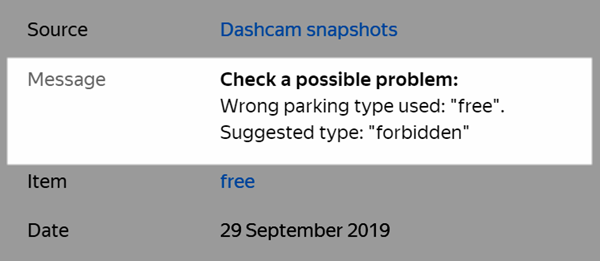
Read the inaccuracy report and compare it against what's displayed on the map:
-
If the inaccuracy on the map has already been fixed, click Already fixed:

-
If this is a spam report, click Reject:

-
If not enough information is provided to fix the problem, click Decline:

-
If you find an inaccuracy, choose the appropriate item and edit it:
-
If solving the problem requires creating a new item, click Create:
-
After making your changes, go back to the inaccuracy report and click Fixed:

-
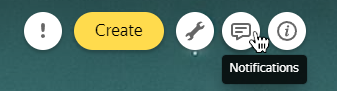
The changelog is stored in the Notifications section:
For more information, see Section 2.11. Reports and suggestions for inaccuracies on the map.