3.18.1. Indoor maps. Drawing rules
Indoor maps are items used to design and display layouts for buildings with multiple levels on Yandex Maps (shopping malls, business centers, and others).
You can create indoor maps for existing facilities, and also for those under construction, provided less than a month is left until their official opening (this must be confirmed by documents, media publications, and so on).
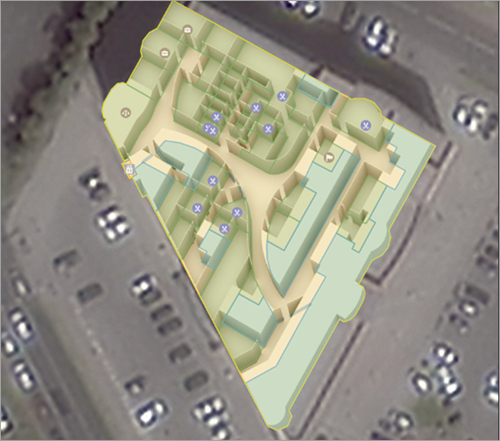
Such layouts have a hierarchical structure: the indoor map is broken into multiple levels usually corresponding to the building's floors. Each floor (or level) is divided into areas of different types. Each of those levels (floors) can house different infrastructure (elevators, stairs, fountains, etc.) and locations (organizations) of different types. The rules for drawing and adding attributes to indoor maps are shown below in the following sequence: Map → Level → Areas → Barriers → Infrastructure → Information items → Locations (organization items).
Alert
Users are currently unable to create indoor maps.
3.18.1.1. Indoor maps
-
For rules on how to start drawing an indoor map, see 3.18.2.1. Indoor maps.
Draw the point where the building's indoor map placemark
 will be displayed approximately in the building polygon's center:
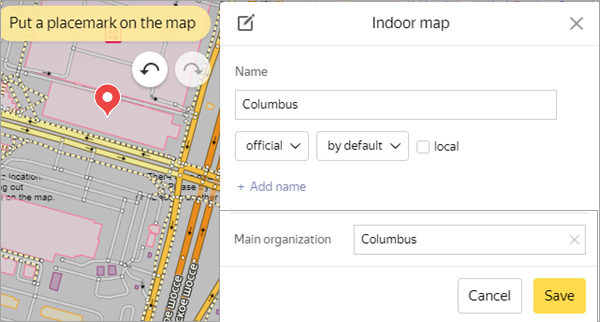
For indoor map display, see 3.18.2.8. Indoor map display.
3.18.1.2. Indoor map levels
-
Techniques for drawing and editing indoor map level polygons are similar to those for drawing and editing all simple polygonal items on the map.
See:
Each indoor map level is similar to the building's floor plan. Additionally:
3.18.1.2.1
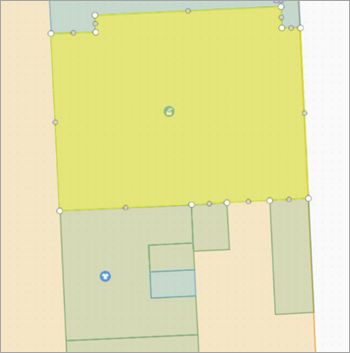
- For buildings whose roof polygons differ from their foundation polygons, draw levels according to the actual geometry of the floors they're on.
3.18.1.2.2
- If a building includes segments of different height, the shapes of level polygons may differ.
3.18.1.2.3
-
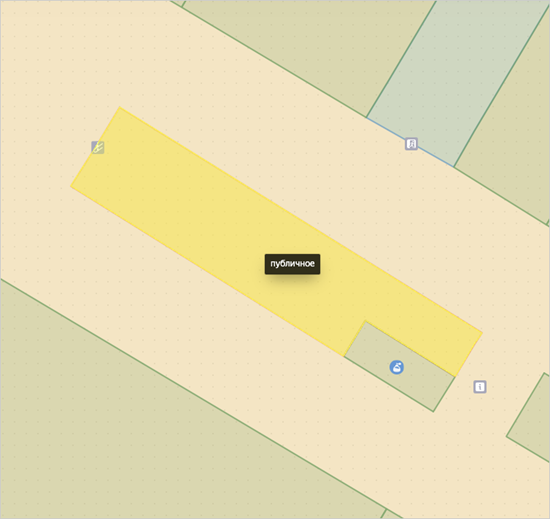
The polygon of the indoor map level can include the polygons of buildings adjacent to the main building of a shopping or transport object, if these buildings are visually perceived as part of this object, even if they are isolated from it (there are no passageways between the buildings). This rule does not apply to structures, such as non-capital buildings and stands. For example, a restaurant that's adjacent to a shopping center:
3.18.1.3. Areas
-
If a level is made up of multiple areas, click Add in the Indoor areas section on the Building level panel.
Techniques for drawing areas are similar to the techniques for drawing all simple polygonal items (see Section 2.7.3. Simple contour objects). Areas on a level are defined by the presence of dividing walls between them. If the level is divided by barriers instead of walls, they are drawn in accordance with the rules for drawing barriers (see 3.18.1.4. Barriers).
Note
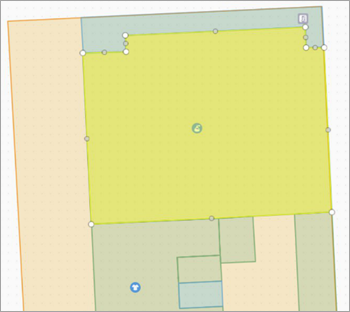
Before you start drawing individual areas, you must create an item with the
public
category in this level's exact shape.Draw areas with 3D maps following the area polygon and shift them to the floor level, as is the case with building footprints. For example:
3.18.1.3.1
- Areas within a level are determined by the dividing walls between them and must align with any
Location
category items within them.
3.18.1.3.2
-
The polygons of adjacent areas must stay consistent at all points:
Correct
Incorrect
3.18.1.3.3
-
You may draw stairs, escalators, and moving walkways as separate areas if there's a free (or partially free) passage underneath them: one can freely navigate the floor despite the presence of stairs, escalators, moving walkways, and the organization located below them.
Separate areas can be allocated for organizations that have an isolated space for the vendor.
3.18.1.3.4
-
Draw separate areas for shopping and business centers'
entrance lobbies
that are an isolated space leading up to the main hall inside the center.
Do not draw separate areas for the
round space
designed exclusively forrevolving
doors.
3.18.1.3.5
-
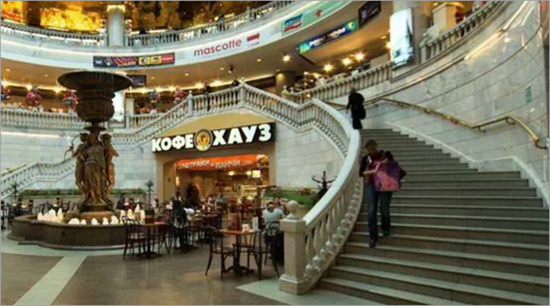
Cinema premises are drawn as indoor maps in the
Business
category with separate auditoriums, toilets, cloakrooms, and so on inside.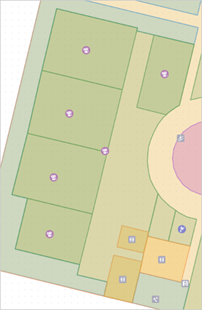
3.18.1.3.6
-
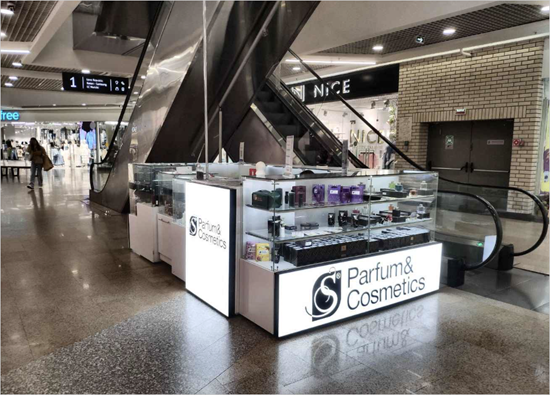
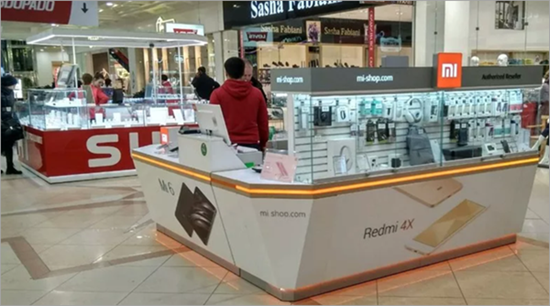
If an organization doesn't actually have its own premises and consists of the premises of smaller organizations, it should be located approximately in the center of the territory it belongs to, preferably indoors.
For example: Eat Market Food Court in Gallery Shopping Center, Trend Island Department Store in Aviapark Shopping Center, Olymp Furniture Center in Olymp Shopping Center.
3.18.1.3.7
- Do not draw separate areas for infrastructure items in
Atrium
andBusiness
areas (for information on room types, see 3.18.2.3. Indoor areas).
3.18.1.3.8
- On indoor maps, adjacent utility and service rooms are not drawn as separate areas but are combined into one or more large areas of the
Staff
type. For information on area types, see 3.18.2.3. Indoor areas).
3.18.1.3.9
-
Don't draw rooms of a business center located on the upper floors of a building that also accommodates a shopping center or another commercial or office facility if these rooms are not part of the said facility.
Employees working with Indoor maps can create levels (floors) for public organizations related to the categories
Culture and attractions
,Recreation infrastructure
, andFood
(for example, observation decks or cafes and restaurants located on the floors of a business center) and for other public organizations on the floors of a business center that don't belong to the specified categories, but only upon request with a floor plan attached.
3.18.1.3.10
-
Indoor areas are drawn differently for waiting areas and food courts.
If there's a dedicated waiting area (premise), draw the whole area as an indoor area. If there are designated waiting seats on a large open territory, only mark these seats as an indoor area.
For food courts, include the entire area of the food court, including its walkways, within the boundaries of the indoor area.
Base the functional area boundary on the outer edges of surrounding areas that border this zone. When no surrounding areas border the functional zone, draw the boundary locally using the map of the area or other available information.
3.18.1.3.11
- Draw a railway platform overlapping with the railway station map (for example, the platform is covered by a roof or located on an underground floor) on the station map as a
Railway platform
. If the platform is partially located inside the indoor map (under the roof) and partially extends beyond it, then draw theRailway platform
only within the geometry of the level. The platform on the indoor map should geometrically coincide with theRailway platform
drawn in the Transport: railways layer.
- Areas within a level are determined by the dividing walls between them and must align with any
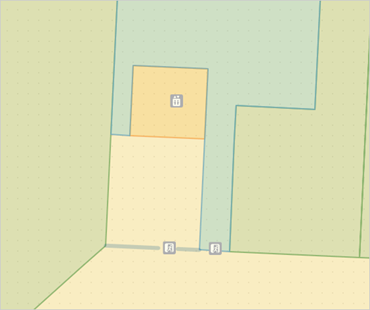
3.18.1.4. Barriers
-
If an indoor map is separated into areas by barriers, such as partitions, go to the Indoor map level panel and click Add in Barriers.
Techniques for drawing barriers are similar to the techniques for drawing all simple polygonal objects (see 2.6.1. Simple linear items
3.18.1.4.1
-
Barriers include walls and partitions that restrict direct passage through indoor areas in public spaces of a building, including corridors, waiting rooms, and food courts).
Don't draw walls and partitions inside
business
andstaff
areas.You can draw room dividers as barriers in public areas with a dedicated space (such as elevator halls or bathrooms).

3.18.1.4.2
- Moving walkways operating within one floor are also drawn as barriers (in one line).
3.18.1.4.3
-
On maps of transport items, barriers include security fences at inspection or baggage checkpoints at the entrance to or inside the building.
Don't draw such fences on shopping center maps.
-
3.18.1.5. Infrastructure items
-
If the level you're editing includes amenities (elevators, escalators), go to the Indoor map level panel and click Add in the Infrastructure section.
The Infrastructure panel will open.
Techniques for drawing infrastructure items are similar to the techniques for drawing places (see 2.5. Places
However (for information about infrastructure item types, see 3.18.2.5. Infrastructure):
-
The item's placemark should be placed in the approximate center of its location, except for items of the following types: Stairs, Escalator, Moving walkway, Emergency exit, Fire escape, Ramp.
Placemarks for those items must be placed at their entrance or exit, except for Stairs placemarks if the exact location of the entrance and exit is unknown or the staircase is located in a separate area.
Placemarks like Escalator are placed only at the entrance to the escalator.
-
Draw infrastructure items of the same type that are located close to each other and work as parts of the same object as a single placemark approximately in its center, provided there are no items of other types between them.
-
Only draw Stairs and Ramps if they connect adjacent floors.
-
In
Business
areas, only the following types of infrastructure are drawn as separate items: Escalator, Stairs, Moving walkway, Ramp, Elevator (if the organization occupies several floors). -
Don't draw items of the Ticket counter and Fitting room types in
Business
areas. -
Baggage checkpoints are only drawn in buildings related to transportation.
-
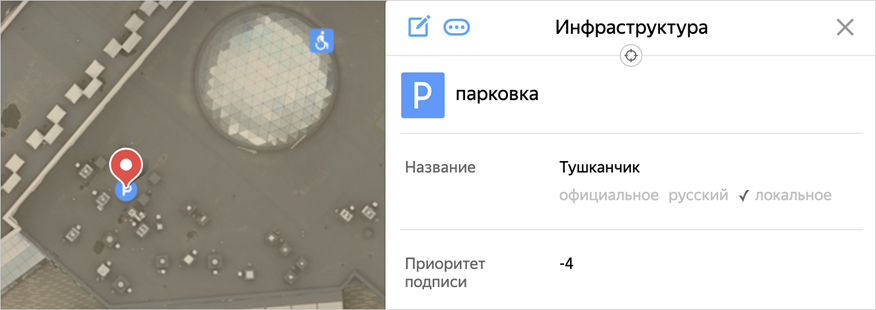
Denote Accessible parking items by placing a placemark in the approximate center of parking areas for the disabled.
-
For named parkings, create a parking icon with the name (in other cases, use a parking icon without a name):
-
Ticket counter items are used for mapping standalone organizations that sell tickets in shopping malls.
Ticket counters at transport facilities are mapped as Transport ticket offices (long-distance ticket counters, suburban ticket counters, ticket counters for people with disabilities, ticket counters for the hearing impaired, and so on). This type of ticket counter must have an official name. Ticket terminals also belong to this type of ticket counters.
-
Cart return area items denote areas with shopping carts located in front of the supermarket (don't create these items for shopping cart areas inside supermarkets).
-
Departure gates are only drawn in buildings related to transportation. Placemarks for departure gates are placed near entrances to railway platforms (on railway terminal maps) or boarding gates (in airports). Their names should only include the gate number.
-
Draw items of the Metal detector arch type at the entrance to transport facilities and sometimes at the exit to platforms. However, if there's a baggage check stand next to a metal detector arch, only map the baggage check stand. Don't draw the two items near each other.
-
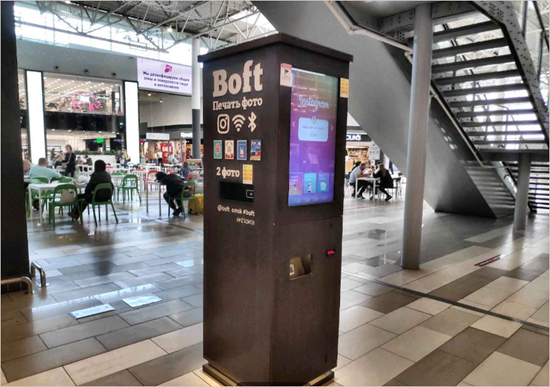
Map items that can be applied in the Indoor layout layer and are part of larger objects that can not be displayed in this layer (for example, you can map sockets for charging built into benches without creating bench items on the map).
-
3.18.1.6. Information items
- Items related to information management are created on indoor map levels in the same manner as infrastructure items. The item's placemark should be placed in the approximate center of its location. For item types, see. 3.18.2.6. Information items.
3.18.1.7. Locations (organization items)
-
On indoor map levels, Locations are created in the same manner as infrastructure and information items: organizations of different categories (auto, food, retail, and so on). See the list of categories in 3.6.2.1. The Yandex Map Editor block).
The differences include:
- Indoor maps can't include the following item types: Shopping center, Flea market, Farmer's market, Stadium, Sports complex, and others. They also have their own types, such as Ticket counter, Aquarium, and others.
- Currently, indoor maps don't include uncategorized items.
All techniques for drawing places also apply here (see 2.5. Places
Place the item's marker to align with the drawn area, positioning it approximately in the center of its designated space (when applicable).
Note
Only draw
Hotel
category items on the floors with a reception desk.